Project Initiation
Project initiation: The first step to successful project management
“Let’s start at the very beginning, a very good place to start.”
We may not be singing do-re-mi against a backdrop of the Austrian Alps, but Julie Andrews’ sage advice applies just as well to project management as it does to music. A good beginning lays a necessary foundation for successful project management. And with project initiation, you can make sure you’re checking all the right boxes before your project kicks off.
What is project initiation?
Project initiation is the first step in starting a new project. During the project initiation phase, you establish why you’re doing the project and what business value it will deliver—then use that information to secure buy-in from key stakeholders.
The term “project initiation” comes from a five-phase model created by the Project Management Institute (PMI). PMI outlines this model in their Guide to the Project Management Body of Knowledge, also known as the PMBOK® Guide. The model divides a project’s lifecycle into these five stages:
Project initiation: Broadly define your project and secure buy-in.
Project planning: Create detailed goals and a project roadmap.
Project execution: Launch your project using information from the first two steps.
Project performance: Measure effectiveness using key performance indicators (KPIs).
Project closure: Debrief with stakeholders.
Project initiation vs. project planning
During the project initiation phase, you define your project at a high level in order to demonstrate its business value. Once you secure buy-in from key stakeholders and prove that your project is feasible, you then move on to the project planning phase. That’s when you define your specific objectives, deliverables, and project roadmap in more detail. Think of it this way—you want to provide enough information to secure approval during the initiation phase, then spend time ironing out project planning details after you get the green light.
Why does the project initiation phase matter?
Starting a new project is exciting, but it’s important to make sure your initiative will actually add value before jumping into the planning phase. That’s where project initiation comes in—it offers a structured approach to demonstrate your project’s business case and prove that the work you’ll do is feasible. Project initiation also ensures that you loop in stakeholders early on, so you can secure essential resources, gain visibility for your project, and prevent costly roadblocks down the road.
Project initiation document template
Establishing a central source of truth before a project begins is the best way to keep your team aligned. Using a project initiation document template can help you do this easily.
The project initiation phase is an important time to establish the foundation of a successful project. Laying out all the key information early ensures that your entire team is on the same page before your work even begins. The best way to do this? Create a project initiation document template.
What is a project initiation document (PID)?
A project initiation document (PID) is a type of document that project managers create before they begin a project. This document compiles key project information such as the project scope, goals, success criteria, business value, and potential project risks. This is also commonly referred to as a project charter or a project brief.
The main goal of the PID is to provide a high-level overview of a project so that key stakeholders can quickly understand the major project objectives and project approach. Key information like the five W’s of project management (who, what, when, where, why) are clearly laid out so team members can find them at a glance. This gives all project stakeholders quick insight into the project objectives, project plan, and key project deliverables.
What is a project initiation document (PID) template?
A project initiation document (PID) template is a reusable outline of a project initiation document. It’s best used when you’re creating new projects so you can quickly duplicate the template, and then fill in the relevant project information. This saves project managers time so they don’t have to create a brand new PID every time they start a new project.
Why should you use a PID template?
Using a project initiation document template provides your team with a few different benefits. Here’s how it can help you:
Establishes consistency across all projects: Using a PID template helps streamline the project creation process, so the project manager can easily follow the same steps every time a new project begins.
Allows for customization for specific teams: PIDs help standardize the project creation process, but one of the major benefits is that you can still customize it to fit the needs of other projects. The template provides the main structure for your project initiation document, but from there you can add and remove different sections based on specific project needs.
Quickly provide context for stakeholders: When stakeholders are managing several different projects at once, it’s important for them to get information quickly with as much context as possible. Using a project initiation document template makes it easy for them to find the information they need without having to hunt for it or have unnecessary status meetings.
What’s included in a project initiation document template?
A good project initiation document template will have all of the important project information a stakeholder needs to know in a glance. This template should include:
Project goals or objective: This clearly states what the project intends to achieve and the larger business objectives it connects to.
Success metrics: These are the specific metrics that your team is tracking to monitor whether or not this project is successful.
Project scope: In this instance, a project scope includes the scope of work, the allotted budget, and estimated timeline.
Communication plan: This details information on how your team will communicate throughout the project duration.
Resourcing strategy: Key resource information such as a resource allocation plan or a resource management strategy plan.
Key stakeholders: Important individuals involved in the project from individual contributors to higher management. A RACI chart would be included in this section.
Project risks: Information about project risks, such as a RAID log or a risk analysis would be included in this section.
Integrated features
Project Overview. Project Overview is your one-stop-shop for all important project context. Give your team a bird’s-eye view of the what, why, and how of your project work. Add a project description to set the tone for how you’ll work together in Asana. Then, share any important resources and context—like meeting details, communication channels, and project briefs—in one place.
Project Brief. A project brief is a way to communicate important details and dates to your broader project team. Make sure your team can easily access your project brief by putting it in a central source of truth like Asana.
Workload. Workload gives you a visual snapshot of team capacity by making it easy to see what your team members are working on across projects—all in one place. With this at-a-glance information, you can pinpoint conflicts, address risks, and keep projects on track by reassigning or rescheduling tasks. Check Workload regularly to make sure team members aren’t overwhelmed or underworked. If they are, you can easily reassign or reschedule low-priority tasks to unblock high-priority initiatives.
Goals. Goals in Asana directly connect to the work you’re doing to hit them, making it easy for team members to see what they’re working towards. More often than not, our goals live separate from the work that goes into achieving them. By connecting your team and company goals to the work that supports them, team members have real-time insight and clarity into how their work directly contributes to your team—and company—success. As a result, team members can make better decisions. If necessary, they can identify the projects that support the company’s strategy and prioritize work that delivers measurable results.
Recommended apps
Slack. Turn ideas, work requests, and action items from Slack into trackable tasks and comments in Asana. Go from quick questions and action items to tasks with assignees and due dates. Easily capture work so requests and to-dos don’t get lost in Slack.
Google Workplace. Attach files directly to tasks in Asana with the Google Workplace file chooser, which is built into the Asana task pane. Easily attach any My Drive file with just a few clicks.
Zoom. Asana and Zoom are partnering up to help teams have more purposeful and focused meetings. The Zoom + Asana integration makes it easy to prepare for meetings, hold actionable conversations, and access information once the call is over. Meetings begin in Asana, where shared meeting agendas provide visibility and context about what will be discussed. During the meeting, team members can quickly create tasks within Zoom, so details and action items don’t get lost. And once the meeting is over, the Zoom + Asana integration pulls meeting transcripts and recordings into Asana, so all collaborators and stakeholders can review the meeting as needed.
Microsoft Teams. With the Microsoft Teams + Asana integration, you can search for and share the information you need without leaving Teams. Easily connect your Teams conversations to actionable items in Asana. Plus, create, assign, and view tasks during a Teams Meeting without needing to switch to your browser.
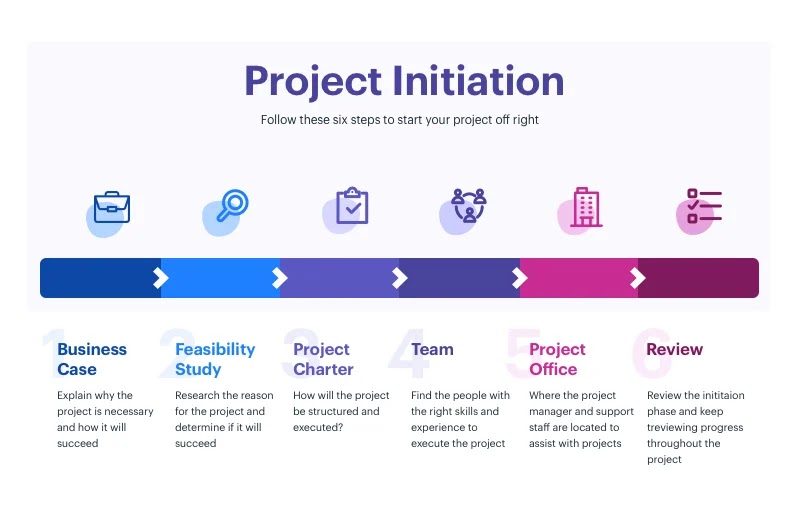
The project initiation process: 4 steps to get started
So you’ve come up with an enticing new project idea—now what? Here’s how to approach this first phase of project management and lay a solid foundation for your new project.
1. Create a project charter or business case
In this first step, you demonstrate why your project is necessary and what benefit it will bring. You can do this with either a project charter or a business case. These two documents follow the same fundamental idea, since they’re both used to outline key project details and pitch your initiative to stakeholders. The main difference between them is scope—you can use a project charter for smaller initiatives, and a business case for larger projects that require significant resources. For example, you might create a project charter for a redesign of your company homepage, and a business case for a company-wide rebrand.
Regardless of whether you use a project charter or a business case, this is your chance to demonstrate how your project will add business value and why you need specific resources like budget, equipment, or team members. Here’s a rough template of what these two documents typically include:
Project charter
A project charter demonstrates why your project is important, what it will entail, and who will work on it—all through the following elements:
Why: The project’s goals and purpose
What: The scope of the project, including an outline of your project budget
Who: Key stakeholders, project sponsors, and project team members
Business case
A business case includes all the components of a project charter, along with these additional elements:
A comprehensive financial analysis, including an estimate of the return on investment (ROI) your project will bring
An analysis of project risks and a risk management plan
An action plan that includes how decisions will be made (such as a RACI chart), a communication plan, and next steps you’ll take if your business case is approved
2. Identify key stakeholders and pitch your project
Next up, determine who needs to sign off on your project charter or business case. This includes key stakeholders who have a say in the outcome of your project—for example, executive leaders, project sponsors, or cross-functional teams that you’re requesting budget or resources from. If you’re not sure who your key stakeholders are, ask yourself the following questions:
Who needs to approve my project?
Who will provide resources for my project?
Who can influence my project?
You can also create a project stakeholder analysis to ensure you’re not overlooking any important players. This methodology involves dividing stakeholders into four main groups: those with high influence and high interest, high influence and low interest, low influence and high interest, and low influence and low interest. Anyone in the first bucket (high influence and high interest) is likely a key stakeholder that should approve your project during the initiation phase.
Aside from key stakeholders, now is also a good time to identify other individuals who may be impacted by or interested in your project. While these people don’t need to officially approve your initiative, it might be helpful to give them an early heads-up, especially if this project will impact their work. They may also be able to provide additional support in the form of insight or resources.
Getting stakeholder buy-in during the initiation phase not only helps you secure approval, support, and resources—it also increases project visibility and prevents costly roadblocks later on in the project life cycle.
3. Run a feasibility study
At this point you’ve pitched your project, demonstrating that it adds value and fits with your company’s overall strategic plan. Now, it’s time to run a feasibility study to confirm your project is possible with the resources you have at your disposal.
Simply put, a feasibility study evaluates whether your project could be successful. It answers the following questions:
Does my team have the required resources to complete this project?
Will there be enough return on investment (ROI) to make this project worth pursuing?
If you can answer yes to both questions, you have a solid rationale to move forward with your project. If your feasibility study concludes that you don’t have enough budget or resources, you’ve created a strong case to go back to stakeholders and request more. And if your project’s ROI isn’t up to snuff, you can use that data to tweak your project plan—or pursue a different opportunity entirely.
Does every project need a feasibility study?
Feasibility studies are typically used for larger projects that require significant company resources. You might not need to run a feasibility study for smaller projects with minimal long-term impact. You can also skip this step if you’ve managed a similar project in the past, your competitors are already succeeding with a similar initiative, or you’ve run a similar feasibility study within the past three years. Keep in mind that a feasibility study takes time and resources to complete, so make sure it’s really necessary before you dive in.
4. Assemble your team and tools
Now that your project is approved and its feasibility proven, you can finally start to assemble your team, workspace, and tools. Here are some pointers to get you started:
A good team can go a long way in making your project a success, and it can take time to find people with the right experiences and skills. It’s a good idea to start this process as soon as possible once your project is confirmed—especially if you need to hire new employees or onboard contractors. And depending on your company’s procedures, you may need to file a request in advance to reassign existing employees to your project.
Consider how you want to organize your team structure. For example, do you want a simple hierarchical structure with team members reporting into single team leads—or does it make more sense to divide your team by geographical region?
Where you work can influence how you work. If you’re planning to manage your project remotely, make sure you have the right infrastructure set up to manage a virtual team. And if your team will work onsite, keep in mind that you may need to request office space well in advance of your project kick-off meeting.
Choose the right tools. Consider how your team will work together on daily tasks—for example, will you use email, Google docs, or more robust project management software? You may want to consider a tool like Asana, which allows you to centralize team communication in one place, assign tasks with clear owners and due dates, and easily organize projects in a way that's tailor-made for your team.
https://asana.com/


